Boat Gelcoat Oxidation Removal: A Complete Restoration Guide
How to identify and remove oxidation from your boat's gelcoat surface. This guide covers the restoration process from assessment through protection for Idaho boaters.
Understanding Gelcoat Oxidation
Gelcoat acts as the sacrificial shield for your boat’s fiberglass hull. This polyester resin layer takes the brunt of environmental damage so the structural laminate doesn’t have to. When UV rays break down the chemical bonds in the resin, the surface develops a microscopic, pitted texture.
We identify this degradation technically as photo-oxidation.
Light hits these jagged, microscopic peaks and scatters in every direction. The visual result is a dull, chalky matte finish instead of a deep, glossy reflection.
Our boat detailing team emphasizes that this issue goes beyond simple aesthetics. As the gelcoat becomes porous from oxidation, it begins to absorb water and contaminants like a sponge. This porosity accelerates degradation and can lead to hydrolysis, a much more expensive structural problem often called “blistering.”
Boats in the Boise area facing the high-altitude sun at Lucky Peak or Cascade are at a distinct disadvantage.
Standard atmospheric data indicates that UV radiation intensity increases by approximately 4% to 5% for every 1,000 feet of elevation gain. A boat sitting on a trailer in Idaho receives significantly more destructive radiation than the same vessel docked at sea level in Florida.
We witness the compounding effects of this environment every season. Road grime from trailering and the rapid heating and cooling cycles of high-desert storage stress the surface further. Uncovered boats in this region degrade roughly twice as fast as those stored indoors.
How to Identify Oxidation Severity
Accurate diagnosis prevents you from doing too much work or removing too much material. We classify oxidation into three specific stages to match the abrasive method to the damage level.
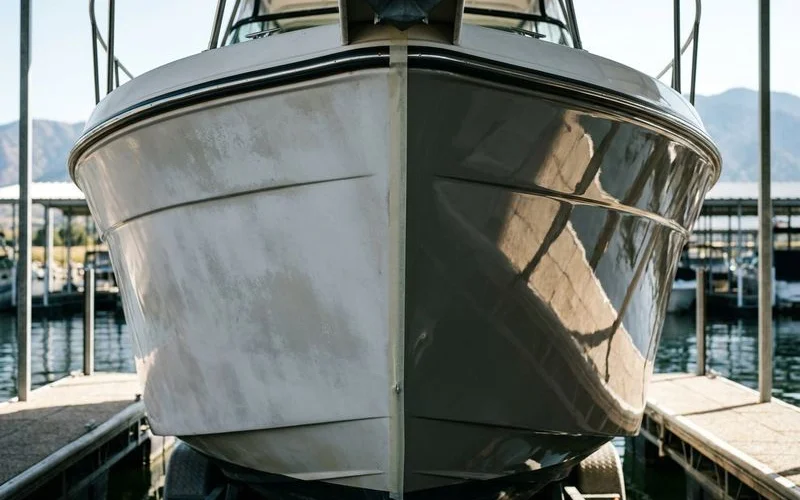
Stage 1: Light Oxidation
The surface has lost its “wet” look but the color remains generally true. You will notice that reflections, such as a dock line or piling, appear slightly blurry rather than crisp.
We utilize the “finger swipe” test for a quick diagnosis. Run your clean, dry finger across the hull. If it comes away clean or with barely perceptible dust, you are dealing with Stage 1.
Correcting this typically requires only a one-step cleaner wax or a fine polish.
Stage 2: Moderate Oxidation
The gelcoat looks flat, matte, and lifeless. Color fading is obvious here, particularly on dark hulls like navy blue, black, or red, which absorb more heat.
Technicians on our crew look for the “chalky” transfer. Rubbing the surface leaves a distinct white, powdery residue on your hand or clothing. This powder is actually dead, oxidized resin that has separated from the surface.
A simple wax application will fail here because the surface is too dead to hold it. You must use a cutting compound to physically remove this layer before you can polish.
Stage 3: Heavy Oxidation
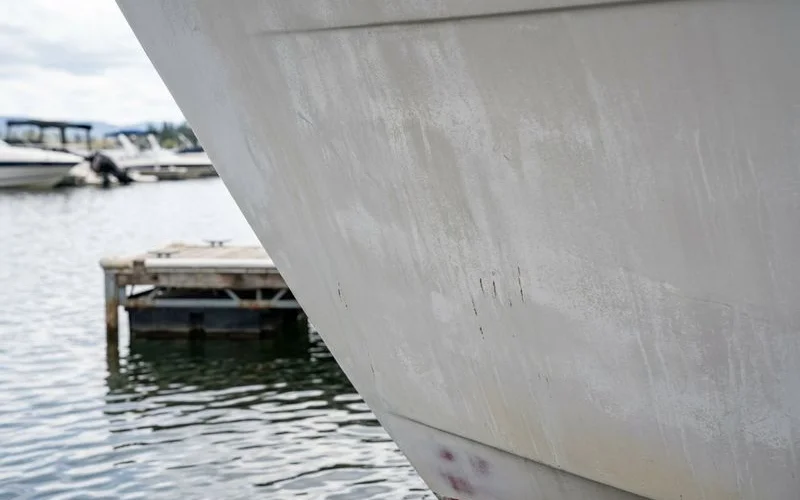
The surface texture resembles 600-grit sandpaper. White hulls often take on a pinkish or yellow hue, while colored hulls appear heavily clouded, almost looking white or grey.
We frequently find the gelcoat is extremely porous at this stage. Water splashed on the hull soaks in and clings rather than sheeting off.
Restoration at this level is aggressive. It often mandates wet sanding (starting with 600 or 800 grit) to remove the pitted material before any compounding can begin.
The Restoration Process
Restoring a boat is a labor-intensive project that demands adherence to a specific chemical and mechanical sequence. We follow a proven protocol to ensure the gloss is not just a temporary oil-filled illusion.
Step 1: Chemical Decontamination
Polishing a dirty boat basically grinds dirt into the surface. Standard marine soap is rarely strong enough to strip old silicones, waxes, and diesel soot.
Our process starts with a high-pH strip wash detergent designed to remove previous protectants. For boats exposed to mineral-rich Idaho reservoirs, we follow this with an acidic hull cleaner containing oxalic acid.
This acid step chemically dissolves water spots and mineral deposits that polishing alone might miss. Failing to remove these minerals will cause them to harden in your polishing pads, leading to deep swirl marks.
Step 2: The Test Spot
Committing to a full hull restoration without a test section is a recipe for wasted time. We tape off a 2x2 foot section on the transom to dial in the exact pad and liquid combination needed.
Always begin with the least aggressive method. If a medium polish and a foam pad restore the shine, using a heavy wool pad and compound is unnecessary aggression.
Gelcoat thickness is a finite resource. Most factory gelcoat is only 18 to 25 mils thick (about the same as three sheets of paper). You want to remove the minimum amount necessary to restore the shine.
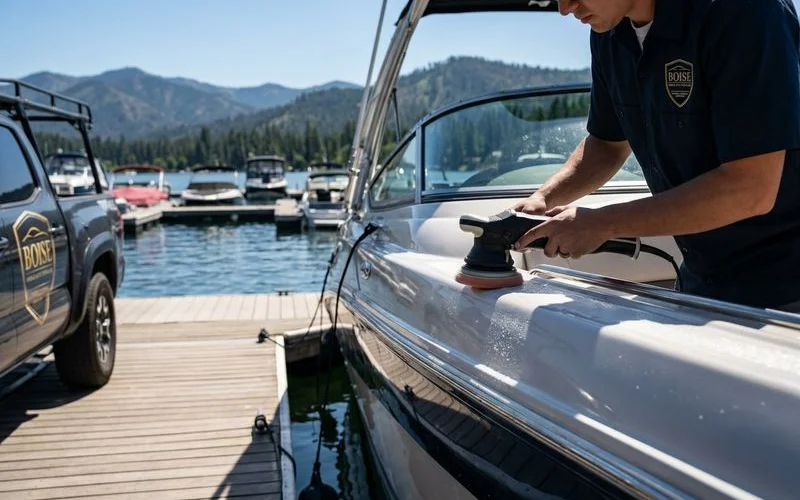
Step 3: Compounding
This stage does the heavy lifting for Stage 2 and Stage 3 oxidation. We utilize a rotary buffer for this step, generally operating between 1200 and 1500 RPM.
Tools of the Trade:
- Twisted Wool Pads: These provide the heaviest cut and run cooler than foam. They are non-negotiable for removing heavy oxidation.
- Marine-Specific Compounds: Automotive compounds are too weak for this material. We rely on products like Starke Level R or 3M Perfect-It Gelcoat Heavy Cutting Compound, which are engineered for the extreme hardness of gelcoat.
Heat management is the critical variable. The surface should be warm to the touch—heat helps the chemical abrasives break down—but it should never be hot.
Keep the buffer moving constantly. Working in small, two-foot square sections allows you to monitor your progress and ensures the abrasives break down fully.
Step 4: Polishing
Compounding removes the oxidation but leaves behind “holograms” or light buffer trails. We switch tools here to a Dual Action (DA) polisher to refine the finish.
A DA polisher oscillates and rotates simultaneously, a motion that eliminates swirl marks. We pair this machine with a yellow or white foam pad and a fine marine polish.
This step is the difference between a “clean” boat and a “mirror” finish. It refines the scratch pattern to a point where the naked eye can no longer see it.
Step 5: Protection
This is the most critical investment for longevity. Freshly polished gelcoat has open pores and will re-oxidize within weeks if left unprotected.
We advise selecting a protection product based on your storage situation and usage frequency.
| Protection Type | Longevity | Best Application | Key Consideration |
|---|---|---|---|
| Carnauba Wax | 2-3 Months | Show boats / Garage kept | Provides the deepest “warm” glow but melts in heat above 160°F. |
| Polymer Sealant | 4-6 Months | Weekend warriors | A synthetic blend (like Jescar Power Lock) offers better UV resistance than wax. |
| Ceramic Coating | 12-24 Months | Outdoor storage | Creates a semi-permanent bond. Highest cost but sheds dirt and UV best. |
Marine Ceramic Coating has shifted the industry standard. These coatings bond chemically to the surface to create a hydrophobic layer that resists oxidation far better than traditional wax.
Application requires precision. While the upfront cost is higher, the reduction in annual maintenance makes it the pragmatic choice for most owners.
DIY Considerations
Achieving professional results in your driveway is possible. However, you must assess the time and equipment investment realistically.
We calculate that a three-step restoration (compound, polish, protect) on a standard 20-foot boat requires 10 to 15 hours of labor for an experienced technician. A first-time DIYer should budget a full weekend or two consecutive Saturdays.
The Equipment Gap:
- Professional Setup: Rotary buffer ($250+), forced-rotation DA polisher ($400+), specific wool and foam pads.
- Typical DIY Setup: Random orbital sander or entry-level wax spreader.
Using underpowered tools is the primary reason DIY projects fail. A standard random orbital wax spreader lacks the torque to drive a compound pad through heavy oxidation. You need a machine capable of maintaining high rotation speeds under the friction load of a wool pad.
Risk factors are also real. It is easy to “burn through” the gelcoat on sharp edges or chine lines where the material is thinner.
We strongly recommend applying blue painter’s tape or 3M green automotive tape over all sharp edges and metal fittings before you start compounding.
Prevention After Restoration
Maintenance is always cheaper and faster than restoration. Once your boat shines, a few disciplined habits will lock in that value.
- Rinse after every outing: Idaho waters are high in calcium and magnesium. Letting these water spots dry creates mineral etching that eats through wax.
- Boost your protection: Apply a spray silica sealant or booster wax once a month during the boating season.
- Cover it up: UV exposure is the enemy. A custom-fitted boat cover is the single highest ROI purchase for gelcoat longevity.
Our data shows a clear trend. A covered boat typically needs heavy compounding only once every 3 to 5 years. An uncovered boat requires aggressive restoration every single spring.
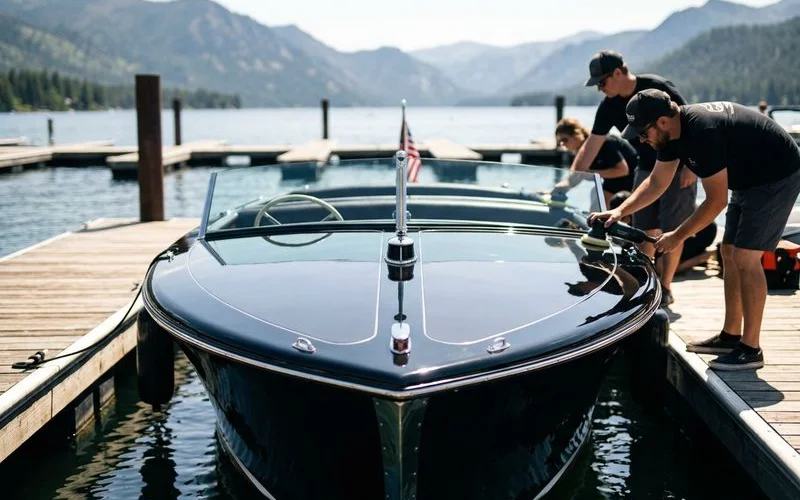
Boise Mobile Auto Detailing Team
Professional detailing specialists serving Boise and the Treasure Valley.